UPDATE: The developer access was widely withdrawn from many accounts since Elon Musk bought Twitter (now “X”). So did it happen to my Twitter-Bot, therefore the account is not posting anymore automatically.
Python is a powerful programming language suitable for most tasks one can think of. Most platforms offer easily applicable APIs accessed through Python libraries to interact with their services. In the case of Twitter’s developer API, Tweepy is a popular library at hand to utilize commands like posting, commenting, or messaging from a code base. In this article, I share how anyone can easily set up an automated posting Twitter-Bot from scratch.
Developer Access to Twitter
Before you can start automating anything, you need access to the Twitter API from your account. Login with your Twitter Account on the Twitter Development Website and scroll down to “Get started”.
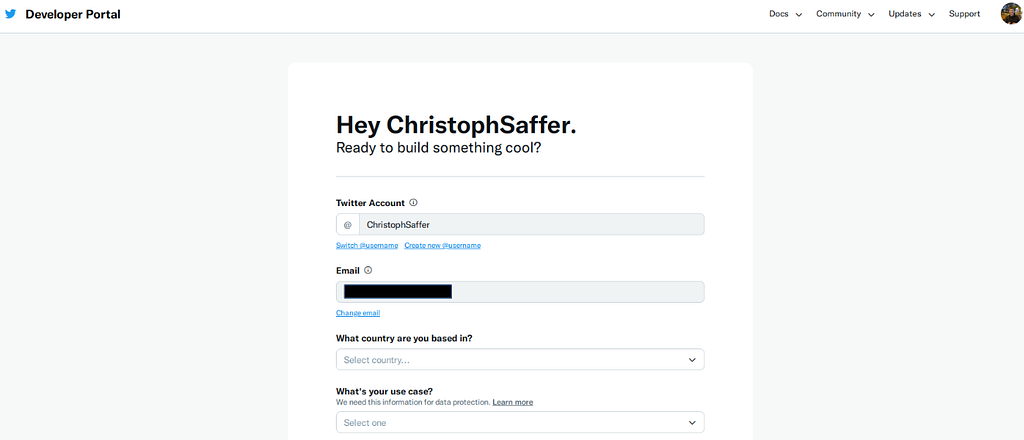
After agreeing with Twitter’s terms and conditions, you are ready to create your application in the Twitter Development API.

Next, you receive API keys to access your account using the API without your initial account password. Save them and store them at a safe location! After that, you are forwarded to the Twitter Development Dashboard, where you get an overview of all your applications.

Before you can start using the application, you have to generate access tokens next to your API keys. To do that, click on your application, choose “Keys and tokens” at the top of the page and generate “Access token and secret”. Subsequently, you will see that your access token only has “read only” permissions. It means you can run reading operations, i.e., fetch tweets from any public account or check followers. However, you are not yet able to post anything.

To change initial permissions, you have to set up an authentication under “Settings”. Here, OAuth 1.0a App permissions are sufficient. After setting up the authentication, you should be able to select “read, write, and direct messages” in order to have full access.

Please note that I created this post on August 20, 2022. Twitter might update its user interface at some point, making this tutorial outdated.
Python’s Tweepy
Once you have successfully created API keys and access tokens, you can start using the Tweepy API. You can install it with pip or any other package manager.
$ pip install tweepy
Tweepy is a library that mainly accesses HTTP POST and GET methods to interact with the Twitter-API. In case you are interested in how it works, you can check out the Tweepy library under /local/python/installation/site-packages/tweepy/ and look into the file “api.py” where you find the function “request” with the variable “method”. It is usually set to either “POST” or “GET”:
def request(self, method, ...)
   # If authentication is required and no credentials
   # are provided, throw an error.
   if require_auth and not self.auth:
        raise TweepyException('Authentication required!')
   self.cached_result = False
   if headers is None:
        headers = {}
        headers["User-Agent"] = self.user_agent
   # Build the request URL
   path = f'/1.1/{endpoint}.json'
   if upload_api:
        url = 'https://' + self.upload_host + path
   else:
        url = 'https://' + self.host + path
...
Insert your credentials and use the following code snippet to test the connection to your account:
import tweepy
api_key = ""
api_key_secret = ""
api_access_token = ""
api_access_token_secret = ""

auth = tweepy.OAuthHandler(api_key,api_key_secret)
auth.set_access_token(api_access_token, api_access_token_secret)

api = tweepy.API(auth)

try:
    api.verify_credentials()
    print('Successful connection')
except:
    print('Failed connection')
If this works, you can test reading requests, i.e. fetch information about a certain user and print some information:
user = api.get_user(screen_name='ChristophSaffer')
print(user.description)
print(user.follower_count)
You can also test a write request, i.e. post a tweet:
new_tweet = "This tweet comes from tweepy"
api.update_status(new_tweet)
Attention: If this does not work, you have not activated writing permissions for your Twitter Development Application. Check the section above!
If you are interested in more use cases such as commenting on tweets, liking tweets or sending private messages, I recommend the Tweepy documentation.
After having completed this pipeline, you can start programming your application. As an example, I collected lyrics of my favorite German artist, stored in the file “lyrics.csv”, and randomly tweet several lines of one random song every day, implemented in the file “simple_script.py”:
import pandas as pd
import tweepy
def random_line(df):
    ...
def connect_to_api():
    ...
if __name__ == '__main__':
    df = pd.read_csv("lyrics.csv")
    line = random_line(df)
    api = connect_to_api()
    api.update_status(line)
This is a simplified version for your application. To collect the data and scrape out the necessary information about the lyrics, I followed the same strategy as in one of my previous articles, How you easily scrape websites using Python.
Daily execution
Now that we have successfully coded a script that sends a post, we have to automate it! For that purpose, we can use Cronjob under Linux. Cronjobs are jobs that are executed regularly and can be accurately planned in the file /etc/crontab in Debian/Ubuntu/Linux Mint. The file might vary under different Linux distributions. Use your favorite editor and edit the file /etc/crontab. After that, it should be like the following:
$ cat /etc/crontab
...
0 8 * * * root cd /folder/to/app; python3.8 simple_script.py
...
This script is now executed every day at 8 am. If you want to specify the time or even the days, there are excellent websites that explain how the cronjob syntax works, for example, cronguru. For sure, there are similar solutions for Windows users.
In order to avoid constantly being forced to have your private computer running, it makes sense to rent a VServer or even a Server for automated tasks with root access and your own shell. Most providers offer these for as little as 6€ / month.
Conclusion
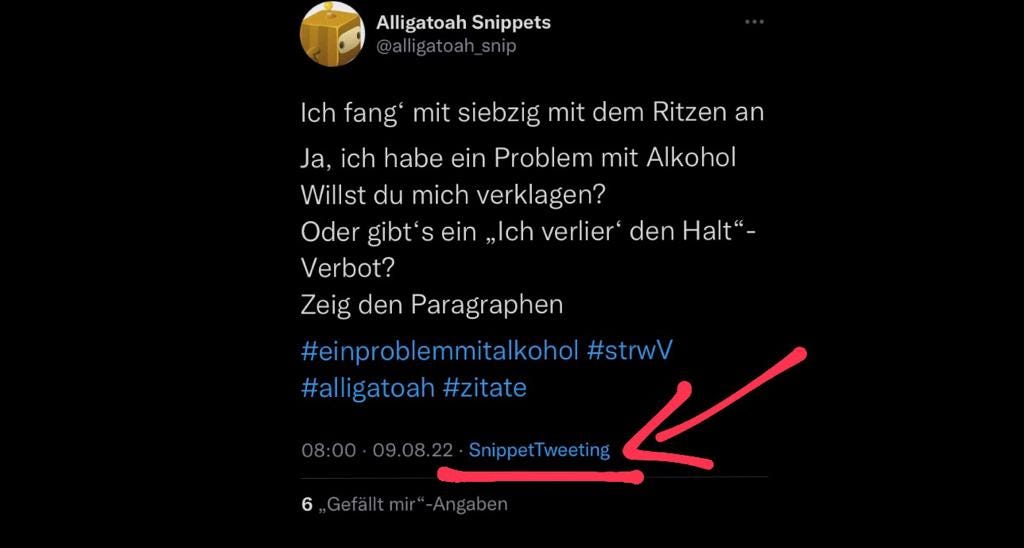
As mentioned, I have an activated Twitter-Bot that posts several lines of my favorite German artist. Check out the account, it is called alligatoah_snip. By the way, posts that are sent by your application have your application mentioned:
If you have used this tutorial for your own account, I would love to read about it. Also let me know in the comments in case you have any criticism or incentives. Thank you for reading, and by the way, if you are interested in what I am doing, follow me on my main Twitter account :).